

 Français
 English
 Español
 Italiano
 Русский

Espace Reva
2 allée Josime MARTIN
13160 CHATEAURENARD
FRANCE
Tel : 33 9 77 63 61 94
Faxnummer : 33 4 32 62 71 35 Tel: 33 9 77 63 61 94

FAQ : IDEAL DISPATCH
Stellen Sie Ihre IT-Aktionen remote bereit, führen Sie sie aus und steuern Sie sie über eine einzige Oberfläche
Some information about distributionsHow to create a new distribution? |
How to create a new distribution? |
|
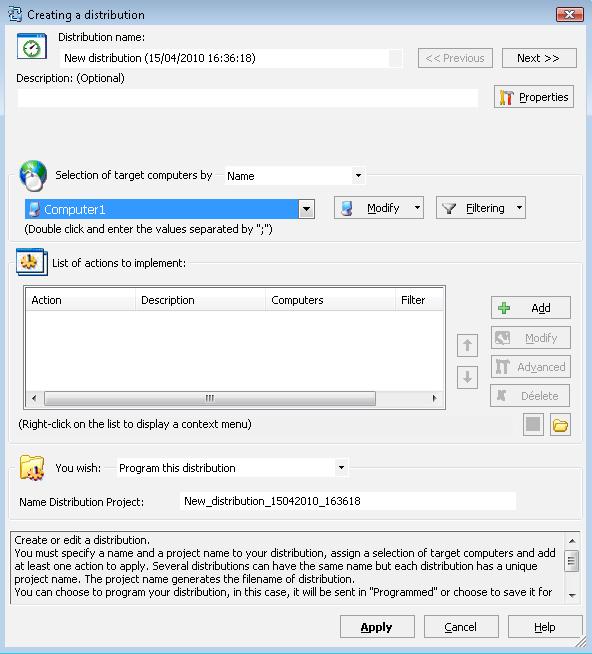
Once a distribution server is added, you can create new distributions.
Each of these steps is detailed below:
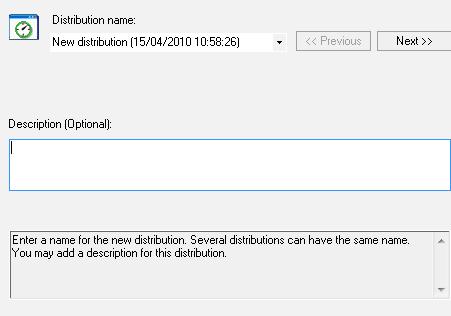
Enter the name and description of the new distribution. These informations enable you to clearly identify it in IDEAL Dispatch Console. The description is optional.
You have access to all the saved or previously implemented distribution in the dropdown.
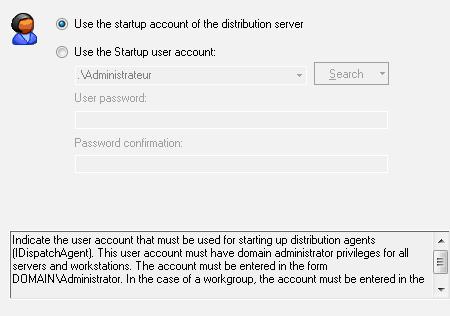
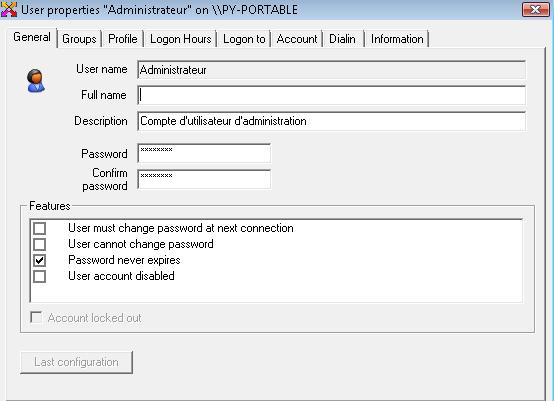
You can view and edit the properties of an account using (
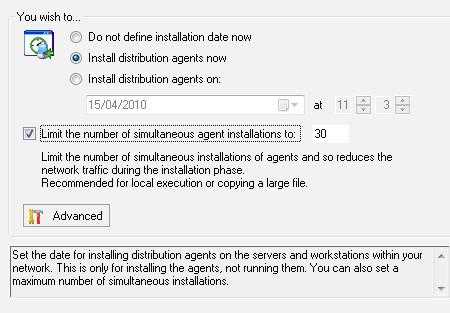
Set the date for installation of distribution agents on servers and workstations. This only applies to the installation of agents and no their execution. You can also configure the maximum number of simultaneous installations. This will lessen, if necessary, the traffic generated by the installations on your network.
Advanced:
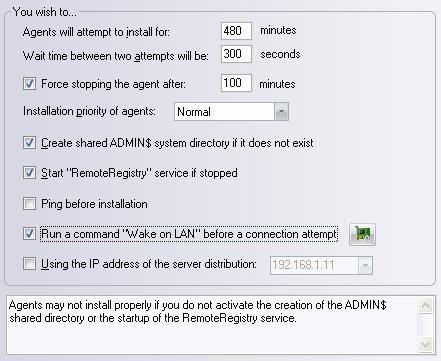
This option determines the maximum period during which IDEAL Dispatch Server will try to install the distribution agent on a workstation. This period is in minutes and can be set between 10 and 9999. IDEAL Dispatch Server uses this option to try a new installation of the distribution agent if there is a failure, making it possible to manage workstations that have not been started up, those which are being started up and those which have not yet been connected to the network (nomadic workstations or others). By default, this period is 120 minutes.
After this time, the distributions are placed in the stand-by distributions folder.
Sets the period in seconds between two connection attempts on a workstation where an installation failure has occurred. By default, this period is 120 seconds.
Force stopping the agent after a certain waiting time, and thus interrupting the current execution on a target computer. Allows to stop actions pending a response or interaction. By default, this period is 100 minutes.
Each installation is run by a separate process. This makes it possible to carry out all the installations simultaneously. You have the option to set the priority the system gives the processes: Low, Normal or High. If the installation must be carried out on a large number of workstations, we advise you to select a Low priority, allowing you to place the minimum load on the system. By default, the priority is Normal.
IDEAL Dispatch Server installs the Windows IDispatchAgent service agents on client workstations using the shared administrative directory ADMIN$. If this does not exist on the workstations, the agent cannot be installed properly. Authorizing IDEAL Dispatch Server to create the administrative directory ADMIN$ means the installation can go smoothly. By default, this option is on.
Before trying to access a client PC's registry or installing agents, IDEAL Dispatch Server carries out a "ping" aimed at the client PCs. This allows faster processing if a target machine is not available. However, you must authorise an incoming echo request in the ICMP parameters of the SP2 XP firewall.
Runs the command Wake on LAN if the target computer is not detected and if the necessary information to Wake on LAN are indicated in the distribution server table.
Distribution agents contact the distribution server using the IP address selected>. Useful in certain cases where the distribution server and the target computers are located on remote domains.
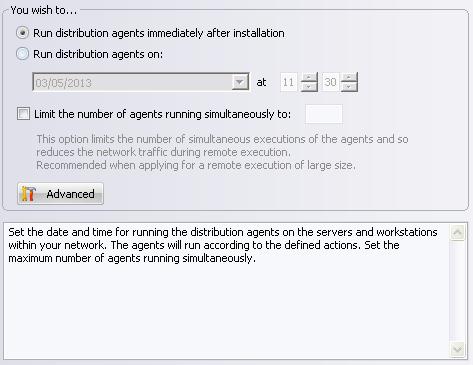
Set the date and time of execution of distribution agents on servers and workstations in your network. The execution of agents corresponds to the execution of actions that you have defined. It is recommended to limit the number of concurrent executions in the remote execution of a large file on a large number of target computers.
You have the option to set a run date for distribution agents. This is optional. By default the agents run the set script or program when the Windows IDispatchAgent is started up.
As for installing agents, you can define the maximum number of agents run simultaneously. Using this option, you can regulate the traffic caused on the network by the running of a script or the updating of software, so as not to create a bottleneck. By default the number of runs is unlimited.
Advanced:
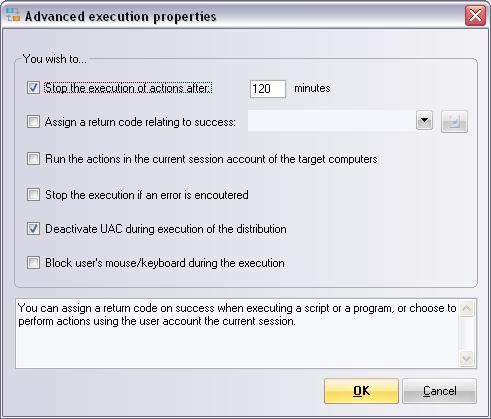
Using this option, you can define a value corresponding to the return code relating to success. By default, an action is identified as successful if its return code is 0.
Using this option, you can run actions using the current session account on the target computer instead of the agent start-up account.
Using this option, you can stop running the distribution as soon as an error is encountered. The following actions are not executed.
Using this option, you can deactivate UAC on the remote computer during the execution of the distribution. When running is over, UAC is set back to it's previous configuration.
Using this option, you can lock mouse and keyboard on the remote computer during the execution of the distribution. When running is over, mouse and keyboard are automatically unlocked.
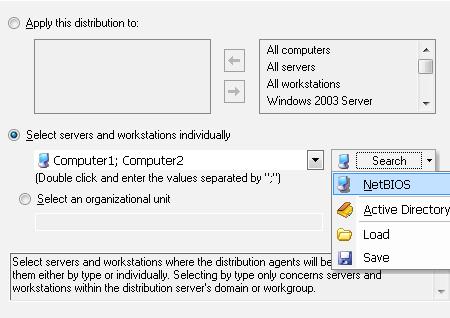
This step allows you to select servers and workstations for which the implementation of the actions must be programmed. It represents the basic selection. In fact, when you create a new action, it will be the default selection.
List of types available: All computers, All servers, All workstations, VISTA, Windows Vista, Windows 2008 Server, 2003 Server, Windows 2000 Server, Windows NT 4 Server, Windows NT 3.x Server, Windows 2000 Professional, Windows XP Professional, Windows NT 4 Workstation.
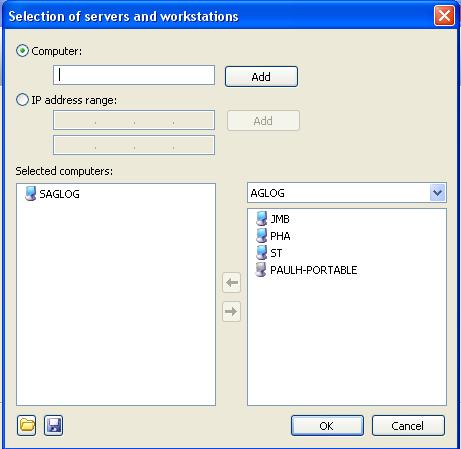
You can generate your list of names in two ways, using: Netbios: You add a computer to your selection:
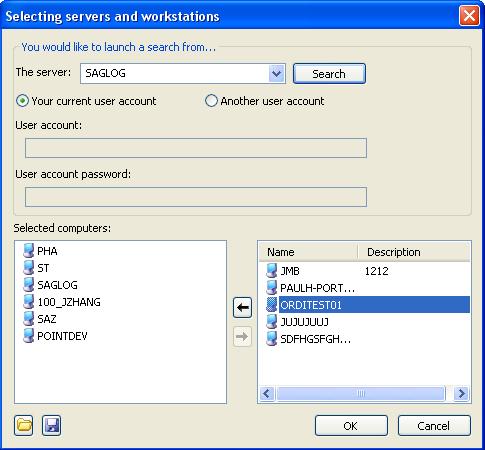
Active Directory:
In these two cases, you can save or load a list of computers.
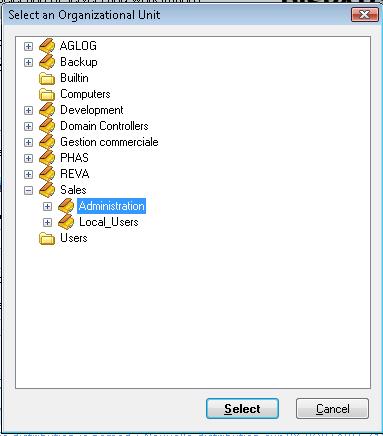
Select the organization unit corresponding to your computer selection.
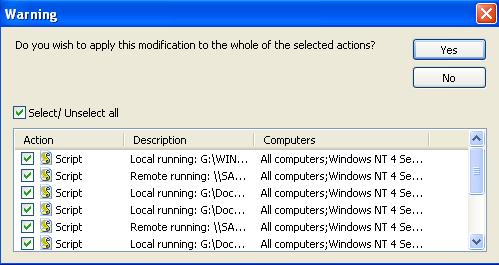
If you have already defined actions, you can apply the new selection to the checked actions.
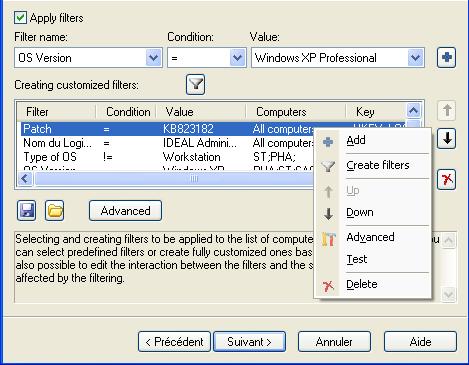
This step allows you to create the list of filters. When you create an action, your filtering is applied by default. There are two types of filter: Predefined filters: These are filters whose values and conditions are already filled in: OS Version, Customized filters: you can create your own filters by clicking on ( ). The "Test Filters" button allows you to identify the computers selected after filtering
If you have already defined actions, you can apply the new filters selection to the
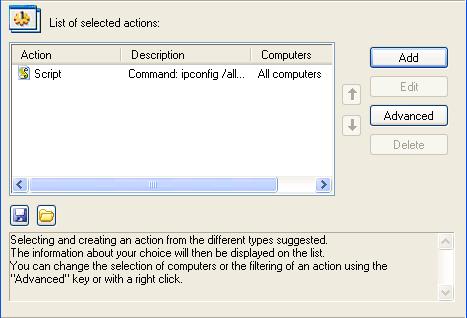
This step ensures the actions are selected before being run on the services and client workstations. Several actions can be run in the same operation.
"Executable" action: Allows you to run a local or remote executable file (.bat, .cmd, VB Script, .exe, "Command" action: Allows you to run a command. "Software update" action: Allows you to install service packs or software updates.
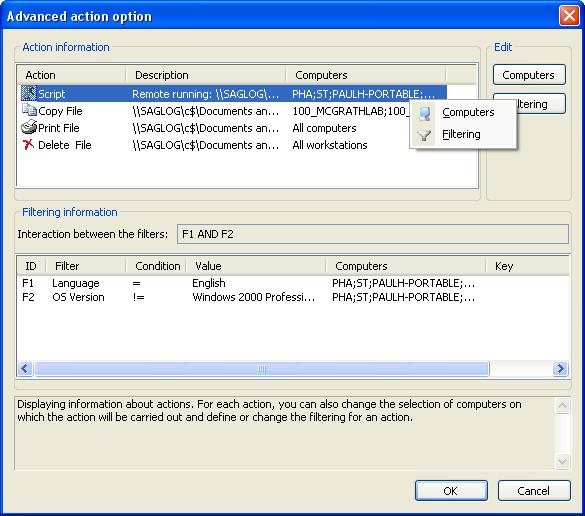
When an action is created, it will be applied by default to all the selected/filtered computers. - from the menu, which can be opened with a right click. If several actions are presented, you can organize the launch order by moving an
Once the running of the script or program as been completed, you can decide to: Do nothing Close the session Restart the computer Stop the computer If you choose to restart the computer or to shut it down, you can display an alert message to warn users. This message may be displayed for a certain period, in seconds. You can also configure the removal of the Windows IDispatchAgent and IDispatchAgentInt services from the client workstation, as well as the "IDispatchAgent" directory. NOTICE: A copy of the file is made on the distribution server before it is deleted.
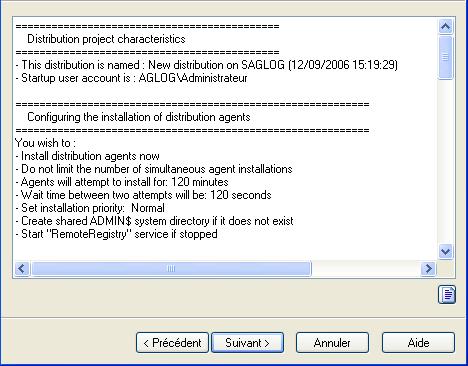
This dialog box picks up all the distribution parameters in a literal way.
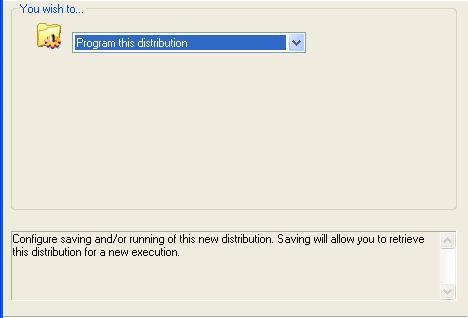
This last step consists of setting the storage mode for your distribution.
When you decide to save a distribution, it is placed in a particular directory and it is therefore not scheduled for future installation and running. The point of storing a distribution is that it can be edited and copied as you wish.
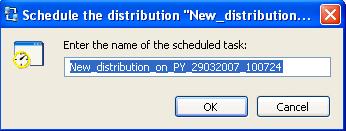
When a distribution is programmed, IDEAL Dispatch Server will not allow it to be
When a scheduled task is created, you can then edit, rename, delete or run it, or display the properties of this distribution with a simple right click of the mouse. You must then give it a valid name.
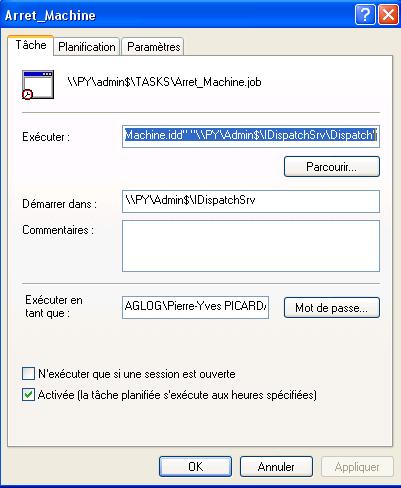
You can then configure your scheduled task, based on your specific requirements.
|
| Letzte Änderung: 16/05/2013 |

Möchten Sie es selbst überprüfen? Testen Sie IDEAL DISPATCH 30 Tage lang kostenlos.
Unverbindlich • Ohne Agent • Support inklusive • In 5 Minuten einsatzbereit


IDEAL DISPATCH 9.9
30-TAGE-TESTVERSION HERUNTERLADE
SOFTWARE
DIENSTLEISTUNGEN
SITEMAP
POINTDEV
ESPACE REVA2 ALLEE JOSIME MARTIN
13160 CHATEAURENARD
FRANCE


